Blog Home > Tips and Tricks, Videos, Wood Finishing
Curly maple, tiger maple, fiddleback maple and quilted maple (various names for different types of figure found in maple lumber) have to be some of the more interesting woods to finish because you can take a board from mild to wild with the simplest of techniques. Here are just a few of them. You can see a full demonstration in the video above, or get the highlights below.
1. Use Dewaxed Shellac for Your Best “Clear” Finish On Curly Maple
|
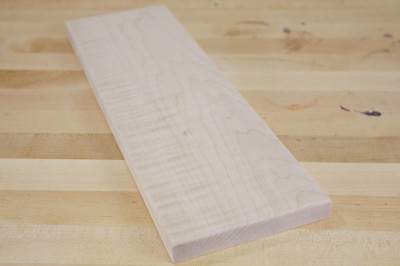 Before – curly maple board sanded to 220 grit, just before being finished with dewaxed shellac Before – curly maple board sanded to 220 grit, just before being finished with dewaxed shellac |
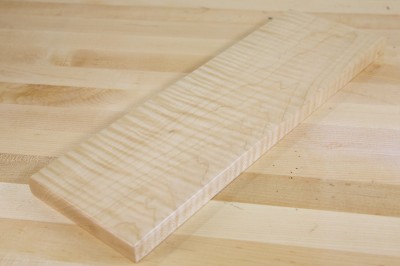 After – with 3 coats of dewaxed shellac After – with 3 coats of dewaxed shellac |
Of all the basic clear topcoats you can choose from, dewaxed shellac provides a surprising chatoyance that you just don’t get with other finishes. That’s not to say your favorite solvent based varnish, polyurethane or lacquer does a poor job – they’re just fine. But the shellac has a touch of magic that’s virtually water white in color and yet brings out curly figure you couldn’t see before while also giving the figure a three-dimensional appearance.
 Zinseer SealCoat is the dewaxed shellac I used in this tutorial. So why dewaxed shellac? First, it’s crystal clear in color – for you purists who disapprove of adding color to wood, this is the product for you. Second, since it’s dewaxed, it’s also a universal sealer. Therefore you have the option of applying a more durable topcoat after the shellac dries. For example, if you need the protection that a polyurethane provides, you can apply that on top of dewaxed shellac and get the best of both worlds – the figure pop and the protection.
Shellac is also a very safe finish that’s easy to apply by hand or by spraying. Plus, any rags you use do not pose the same fire danger that oil-soaked rags do.
How to Apply Dewaxed Shellac:
- Prep your material by sanding to 220 grit, clean off the dust
- Using a cotton pad, brush or a lint-free rag, apply the shellac. It dries fast, so work quickly and try not to overlap any areas that are already tacky
- After the coat dries (10 to 15 minutes is often adequate), sand it with fine sandpaper or a synthetic finishing pad
- Apply another one or two coats to your satisfaction
- Once the last coat is dry and sanded, you can apply a paste wax and buff it to a glassy-smooth surface
|
2. Try Oil for Popping the Grain and Giving Curly Maple an Aged Amber Color
|
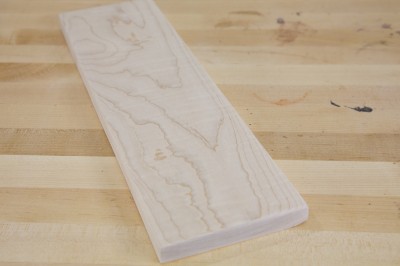 Before – curly maple board sanded to 220 grit, just before application of tung oil Before – curly maple board sanded to 220 grit, just before application of tung oil |
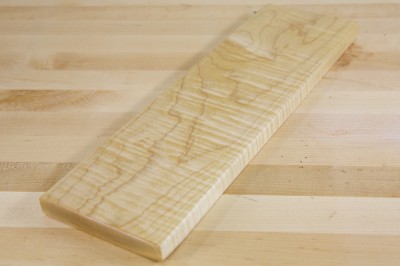 After – with 1 coat of tung oil varnish After – with 1 coat of tung oil varnish |
 Tung Oil Varnish blend is what I used in this tutorial. While oil finishes do a wonderful job at highlighting the figure in curly maple, they also add a gentle amber color. An oil such as tung oil or boiled linseed oil will also reveal and add punch to figure that may have been difficult to see in the raw board. You can apply numerous coats of these oils to build up a sheen, but that’s a process that takes a long time because it takes 12 hours or more for each coat to dry.
My technique, when using oils, is to apply just one coat, let it dry, hit it with a coat or two of dewaxed shellac, then either wax and buff it, or spray two or three coats of lacquer then wax/buff (depends on the application). The point here is you get the effect of an oil with the first coat; to build a protective coating with a satin, semi-gloss or gloss sheen, it’s quicker to seal it with dewaxed shellac and move on to lacquer rather than build up multiple coats of a drying oil. Of course . . . opinions vary.
How to Apply Tung Oil or Boiled Linseed Oil:
- Prep your material by sanding to 220 grit, clean off the dust
- Follow the directions on your can of oil. You most likely need to thin the oil with mineral spirits. If so, don’t skip doing so
- Work in a well-ventilated area. Use a clean lint-free cotton rag to wipe the oil on your work piece, just apply a thin coating
- Allow it to sit for 10 to 15 minutes, then wipe it off with a clean rag.
- Let your work dry, then make a choice: 1). add another coat, 2). wax/buff, or 3). apply a sealer, then topcoat and wax/buff
|
3. Use Dye for Bold and Stunning Figure Pop
|
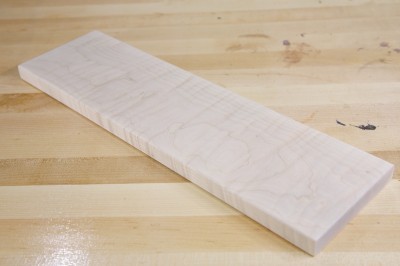 Before – curly maple board sanded to 220 grit, just before application of brown dye Before – curly maple board sanded to 220 grit, just before application of brown dye |
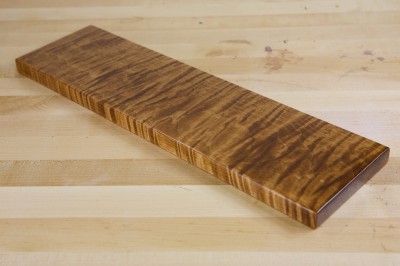 After – 3 coats of Solar-Lux Maple Brown dye (each coat sanded off before the next coat), 1 coat of tung oil After – 3 coats of Solar-Lux Maple Brown dye (each coat sanded off before the next coat), 1 coat of tung oil |
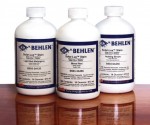 Behlen Solar-Lux Dye doesn’t raise the grain like water based dye does, and it comes in a wide variety of colors. You won’t find a better way to make the figure pop from across a ballroom than you will with aniline dye. Dye is different from your usual oil stains, and it’s just the thing for figured woods like curly maple. While you can just hit curly maple with a single coat of dye and move on to your clear topcoat, I like to do three diluted coats of dye and sand it off between each coat. It might seem counterintuitive to apply it and then sand it off, but if you watch the video above you’ll see why.
The color I used in the sample above (and in the video) is Maple Brown by Behlen Solar-Lux.
How to Apply Alcohol Based Dye on Curly Maple
- Prep your material by sanding to 220 grit or finer, clean off the dust
- Dilute the dye by 25% to 50% with denatured alcohol
- Use a cotton rag or a sponge to apply the dye. It dries fast, so work quickly
- Let the coat of dye sit for 5 to 10 minutes, then sand the work piece until the color comes off the surface of the wood. You’ll see that the curls remain colored. That’s perfect
- Apply two more coats of dye, sanding it off between each. Do not sand off the last coat.
- Soon after applying the last coat, dampen a rag with denatured alcohol and wipe the work piece to even out the color and blend in any lap marks you created
Optional: after the last coat of dye has dried, apply a light coat of tung oil or boiled linseed oil. This will add another small boost to the figure.
Dyes give you a whole rainbow of colors to work with, plus you can make them as diluted or as vivid as you like. Here are some other examples:
-
-
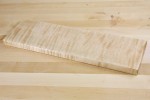
Brown Maple Solar-Lux dye applied once, then sanded off. Then it’s finished with 3 coats of spray lacquer. You get a lot of punch in the figure while keeping an overall light color.
-
-
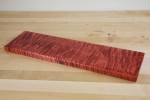
Deep red mahogany dye applied with the same process as above.
-
-
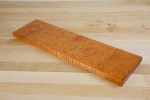
Golden Fruitwood dye applied with the same process as above.
-
-
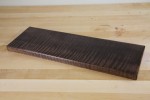
Jet Black dye wiped off with denatured alcohol until it looked dark gray. Then one application of Golden Fruitwood dye to add a little bit of orange color to the lighter spots
|
Vice President of Operations – Woodworkers Source
We’re a family-owned lumber & woodworking supply retailer with 3 delightful stores in Arizona, and 35 friendly employees.
Mark oversees the company and creates tutorials on wood finishing and woodworking tips for hardwood lumber.
Woodworkers Source is a division of MacBeath Hardwood Co.
Discussion, Questions & Answers

